Wednesday, October 23, 2019

Israeli P-51D in 1/32 scale


  IAF P-51D #19 in the 1956 Sinai Campaign


P-51 Mustangs, like Spitfires and Avia-199 (Messerschmitts) had been in IAF service since the Israeli independence war of 1948.  In 1956 together with the British and French armies, Israel again used the P-51 in combat against the Egyptian army in the "Sinai campaign". This model replicates one particular aircraft of 105 "Scorpions"  squadron that during a strafing attack on October 31st was shot down by Egyptian anti-aircraft fire.  The pilot, Lt. Eldad Paz crash landed the plane and escaped. 


THE BUILD

 I was glad to see another P-51D Mustang kit released in my favorite 1/32 scale by Revell which historically has moderately priced their large scale kits. That being said, this is not a high priced "Tamiya" kit with all the usual outstanding details and flawless fit, but you get what you didn't pay for.  Not a bad kit at all but patience will be a virtue to success.  Unfortunately (for  me anyway)  it was an earlier version of the P-51D that lacked the vertical tail fillet of later Mustang aircraft.  That became a minor dilemma and the solution was to convert this model with either an aftermarket conversion tail or kit-bash from another kit.  I opted to kit-bash on the tail from a "Dragon" P-51D.  I used the Dragon kit mainly because I already had it and wasn't intending to build it.  Here are some photos of that build.


I opted to use the instrument panel from the Dragon because it was better detailed and clear.  I applied individual instruments from behind the dial glasses. After painting the front black, I used a wooden toothpick to scrape the paint away from the clear dials.


The cockpit tub and framing is nice but will give a headache later on to close the fuselage halves.......Revell.


The pilot figure is from Zoukei-Mura.  A nice rendition and easy to paint as the details are sharp and clear.


Here I've attached the Dragon kit tail section, and you can see it's a perfect fit with only minor putty to fair it in.  The profile being nearly identical to the Revell fuselage. I did take the time to fill and sand a few hundred rivet holes that are covering the surfaces of the tail section empennage.  That is the huge detriment to the Dragon kit and the reason why I didn't just build that kit.


In this photo you can see the fuselage has been closed but not without some effort to fit the internal framing into place.  It required that I sand off the exterior until I had paper thickness in places.  Finally after countless dry fits, it closed up without any gaps.  The less putty you need when building a model, the better.


Painting and finish

I used The "Hataka" orange line Israeli Air Force "Early period" lacquer camouflage colors, and they were relatively easy to use.  This was really my first experiment with the brand and I was surprised that I didn't have much trouble.  They spray nicely, didn't clog the tip and the colors were very close to my references.


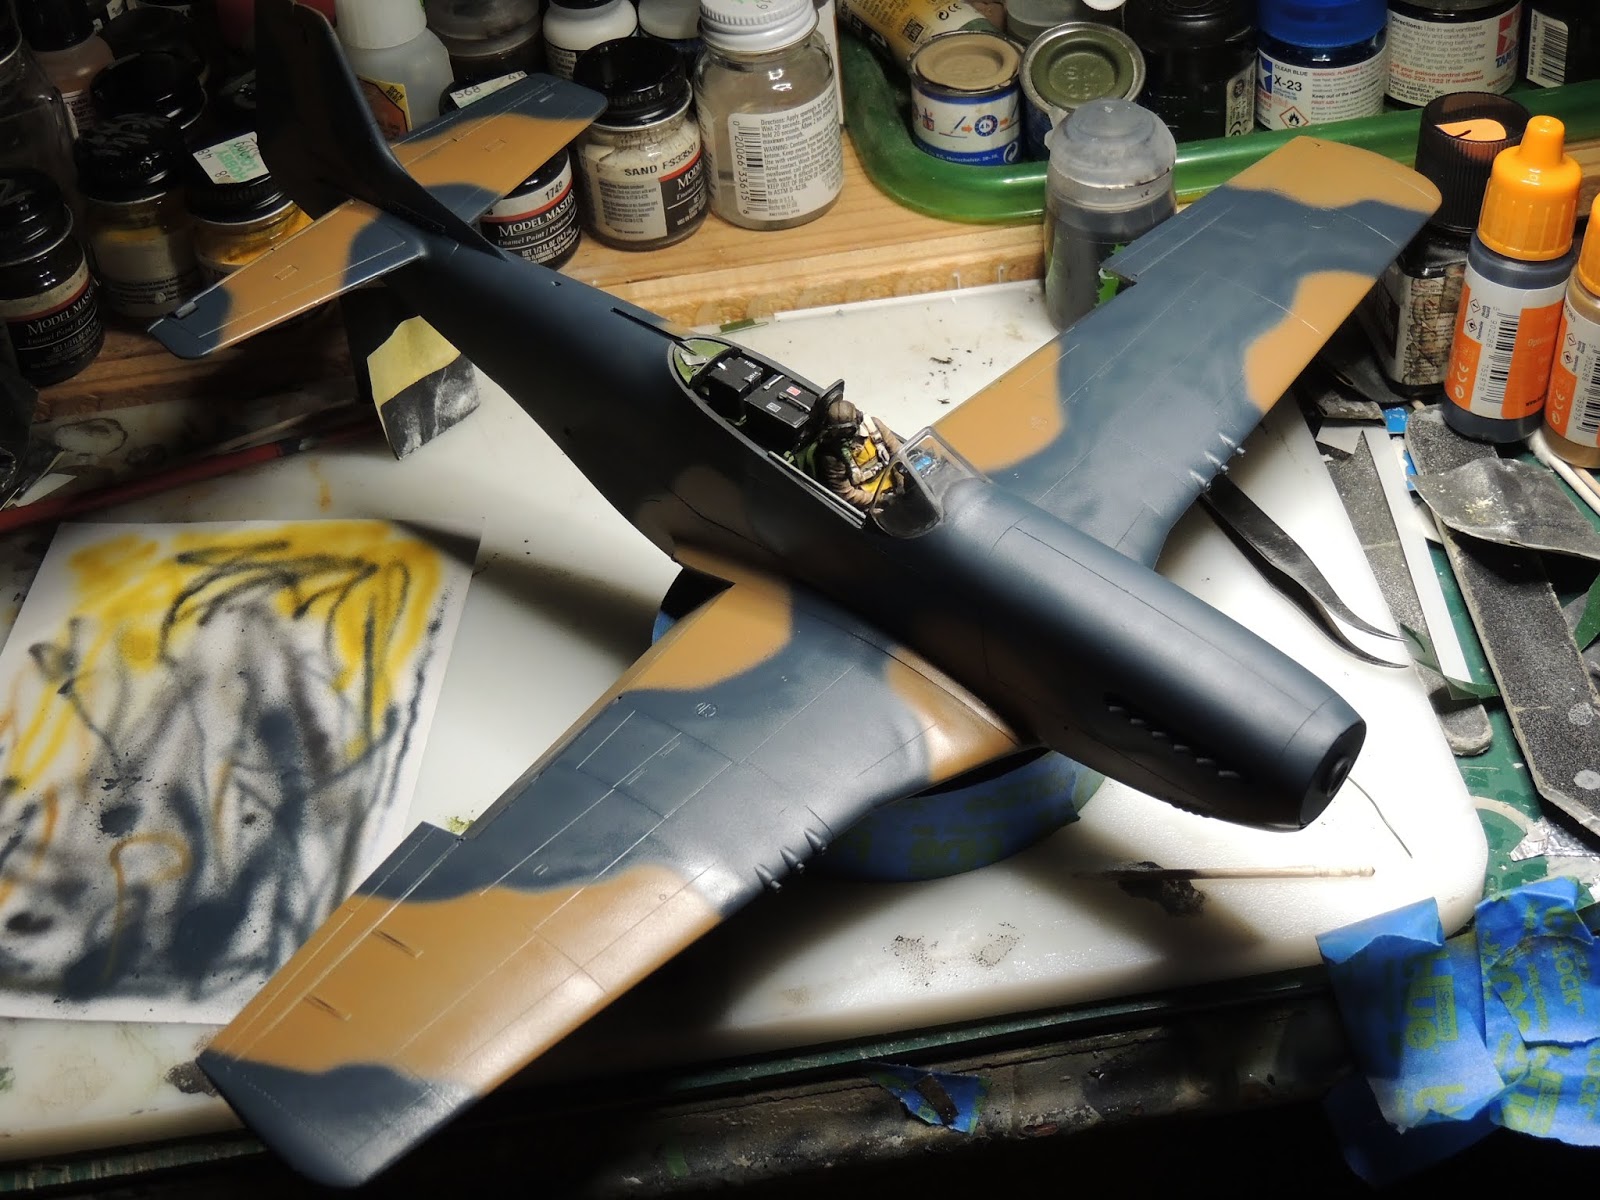
After I tightened up the pattern to get it as close to my reference as possible I painted on the yellow and black campaign stripes with Testors Modelmaster enamel paint.  The stripes are applied per my reference for #105 "Scorpions" squadron which were a variation of the usual.  I then gloss coated with Future floor finish and prepared for the decals.  The IsraDecal set in 1/32 scale, #IAF-92 is specifically for the P-51D and has all the markings necessary to replicate every single Mustang that ever served in the IAF. 


THE FINISH LINE


Tuesday, August 20, 2019

1/35 "Kit-bashing" two Israeli tanks M-50 & M-51

IDF M-51 SHERMAN TANK IN 1/35TH SCALE
Kit-bashing two tank models from 3 kits.
PART-1       THE M-51


Background

  After my last aircraft  build (see the RF-4E post) I needed some time to "decompress". So, I built some armor.  Unlike 1/32 aircraft, an armor build can take as much or as little time as you care to invest in it.  The satisfaction of a successful build is not a distant goal as it can be in an extensive aircraft project.  For this reason I try to intersperse armor between aircraft modeling. I hadn't decided yet what I'd pull out of stash, but as it turned out this project came together at just the right time.  I was at an IPMS competition and the model vendors had some interesting stuff for sale at very reasonable prices.  In the end, I picked up 3 kits for about $60 total outlay.  They were: Dragon "Premium" M-51, Academy M-51, MP Models M-50 and a Verlinden 3 piece transmission casing in resin. And so, the fun began......


Starting off: The M-51

 The first thing to do was decide which parts, from which of the kits would combine the best and fit well enough to replicate an IDF M-51 (Sherman M4A3) with a cast hull........... but this one was special.  It had a 3-part transmission casing which was a unique combination and in hundreds of photos of IDF M-51s that I checked for references, this was the only M-51 constructed in this way.  Here are the photos of that particular tank as it appeared during the 1973 Yom Kippur war. Luckily all the markings were visible in the photos so no need to guess.


HULL & ENGINE DECK
I used the Dragon M-51 "Isherman" (misnomer) cast hull.  The part was well detailed and I liked the cast steel texture better than the Academy kit which (to my eye) looked too uniform and unrealistic. So to begin, I used the engine deck (early version) that was included in the MP Models M-50 M4A4 kit.  It wasn't an exact fit as it was made to fit a longer hull,  so I shortened it and shimmed it all around with styrene strip for a good fit.  I used "Apoxie" putty to replicate weld seams where appropriate.


Next thing to do was to fit the "Verlinden" resin, 3-piece transmission casing.  Some minor adjustments and I was satisfied with the fit on that as well.  


This photo shows it finished and secured in position with a line of added bolt heads across the top made from styrene hex stock.

The Academy sprockets were a best fit to the resin conversion part and also to the one piece "DS" tracks provided in the Dragon kit. These were attached after a few more minor adjustments by the addition of an appropriate spindle (5mm styrene round stock) to hold the sprocket to the gear casing.


 Moving along nicely now, I assembled the HVSS suspension and road-wheels from the Dragon premium kit which of course assembled well to the Dragon hull.  I have to say that these are really fiddly little assemblies and could have been engineered with half as many parts to achieve the same result.  I guess high parts count is the way that most higher end premium kits justify the expense.  I mounted the DS track to check fit and again all was well.


The last photo shows that I used the Dragon turret, mantlet and metal barrel from the M-51 kit.  The spent shell casing hatch was glued in place and then blended in with Apoxie putty.  I love that stuff.  I used the commanders cupola from the Academy M-51 kit.  You can see in this photo that some of the metal-etched parts from the Dragon kit were applied around the mantlet cover and these dress up that area pretty well.  The muzzle blast deflector on the M-51 is a strange beast which adds an aggressive appearance to the M-51 compared to earlier Sherman tanks in the IDF.  There is some contention as to the size of this assembly in 1/35th scale.  You can see in these photos a marked difference as to how it should look from one kit compared to the other.  i went with the Dragon kit offering (in Grey)  The Academy part (in tan plastic) looked way oversize to my eye.


Next the fenders, jerry-can holders, spare tracks and roadwheels, tools and tool boxes were attached all coming from the Dragon M-51 kit.  Nice fender supports (in photo-etch metal) were included in the Dragon premium kit. They were easy to bend and attach.


PAINT
I base coated the entire model in flat black paint which is my usual method.  Following up with "Mission Models" IDF SandGrey, version 1, acrylic paint.


The model was pin-washed and streaked with some light chipping all applied by brush.  The figures are "MiniArt"  US Tank Crew #35126.  I painted and lightly converted these figures with Apoxie putty to replicate Israeli tankers from the 1960s-70s.  


FINALE

So there you have it.  This should really be called "part one" of the "kit-bash" because with all the left-over parts I built a second IDF Sherman, an M-50.  I'll post again with that build and finishing of that model next.