ISRAELI AIR FORCE RF-4E / 1970s
TAMIYA 1/32 F-4J CONVERSION


ORIGINAL WARPAINT AND TACTICAL NUMBERS


The Israeli Air Force received the McDonnell-Douglas F4-E Phantom II in September of 1968. At the same time, six photo-reconnaissance RF-4Es were also ordered. These aircraft would eventually replace the Mirage IIIC aircraft tasked at that time with all high altitude photo missions. The RF-4E however would not arrive in Israel until February 1971. In the interim, the first recon missions were flown by regular F-4E aircraft modified by removing the 20mm cannon and installing cameras into the gun fairing under the nose. The first RF-4 "photo-phantom"s to serve in Israel were actually USAF RF-4Cs. Two aircraft were temporarily "loaned" (for about 1 year) to the IAF, while the Israeli RF-4Es were being assembled. These two aircraft were immediately painted in Israeli desert camouflage and both flew with #69 squadron "The Hammers" (Israeli Air Force heavy bomber squadron) between August 1970 and March 1971. They returned to the USAF after the arrival of the first IAF RF-4E. For self-defence, IAF RF-4Es are equipped to employ either the AIM-9 "Sidewinder" missile or Israeli designed "Shafrir". The ability to fire AIM-7 "Sparrow" missiles was removed from all RFs and the underfuselage recess for these missiles was aerodynamically faired over.
"The Hammers" #69 sq. The first Israeli F4 Phantom II squadron to fly the RF-4E.

THE MODEL

The biggest part of this conversion will be the addition of an RF-4E photo-recon nose and that comes in a resin conversion set from "Avionix". Here are photos of the major parts included.
The bottom fuselage piece

The installation of this part (a new wheel-well and with faired over AIM-7 "Sparrow" recesses) requires that a section of the kit lower wing is cut away to be replaced by this resin part. That is simple enough (Read on....I was wrong about how simple ) and just requires some skill with cutting straight lines in plastic and being sure that everything is tight and straight when it's glued into position. If you are attempting this conversion, be careful not to remove too much material....this is what it should look like if you've done it right. I borrowed this photo from the internet so the reason for different color of the resin part. My pieces were all grey....

The RF-4E photo-nose part:

A nicely detailed (and heavy) chunk of resin. You won't need any ballast at all just a substantial nose gear strut to support the weight. I chose the "J" model of the kit for 2 reasons. It has the shorter nose fo the resin conversion and also, most importantly, I already owned this kit and they are quite expensive. Some minor clean-up will be necessary as mine had tiny lumps here and there that a sanding stick quickly smoothed. The low, aft camera lenses were slightly deformed, so I used a motor-tool to grind them away and I'll replace with my own lenses later on. The openings for the cameras will require clear acetate covers which I'll insert at the very last after it's all painted.
RF-4E front instrument panel

RF-4E rear instrument panel


The photo-recon Phantom II front cockpit can be quickly identified by the double radar display at the top of the instrument panel. In general the instrument panel appears similar to other versions of the Phantom except for this detail. Later on I'll use the Eduard "Color Zoom" interior detail set to finish my kit instrument panel and cut the double radar displays from this resin piece to replicate an RF front panel.
SEAMLESS ENGINE INTAKE TRUNKS
The engine intakes are really not up to the standard of the rest of the kit. They suffer from the same problem as most Phantom kits in that the interior geometry is all wrong and has visible seams which detract from the overall appearance. So these "seamless" one piece resin intake trunks made by CUTTING EDGE are next in the conversion parts I'll use. Other companies offer similar "seamless" trunks, but I just happened to have these in my spare parts stash. The fuelage needs to be cut in the area where these will be attached and "careful" is the keyword here. Cut most of the plastic away as directed in the instructions, dry-fit, sand a little bit, dry-fit, sand a little bit, dry-fit...you get the idea. This is how the parts look like before assembly. The fuselage photo shows area cut for the intake trunks and also the lower portion of the nose fuselage where I'll attach my new conversion part.

.

Before I glued the splitter plates to the new resin intake trunks, I painted the interiors with the camouflage brown color. From my references, this color extended back into the trunk until the end of the splitter. It's easier to mask the demarcation line and avoid any paint spray entering down into the trunk while it's still open.

This photo shows the new resin intakes glued into the fuselage. I've also attached the cockpit sidewalls in place. Each new item being included into the forward fuselage of this model affects the other conversion parts. I've had to dry fit each item a hundred times to insure nothing is out of position, even a millimeter.........


At this point I was confident that my parts would fit together without any major problems (I was wrong !!!) so I glued the new camera nose in place. This will define the length and the width of the forward fuselage for the cockpit placement.


AVIONIX F-4C RESIN COCKPIT SET
I'd used the "Avionix" F4-E cockpit set before on another 1/32 Phantom build (see November 2014). The detail is very fine and appears generally accurate. This cockpit set is for an F4-C which is similar to the cockpit of photo-recon jets. The aft bulkhead in the kit needs to be cut away to fit the new rear WSO (Weapons Systems Officer or "Navigator" as the Israelis refer to the back seat pilot) tub and you can see in the next few photos what else had to be adjusted. The center transverse horizontal frame between the cockpits is also removed to make way for a highly detailed replacement part.


I had some time and energy over the weekend to do some painting in the cockpit area. It's always "double the fun" when I build an F4, as the crew sit in separate cockpits. Here is the Avionix cockpit (F4-C version) and ejection seats before and after painting. This step has to be done first so I can close the fuselage halves and start the preparation for painting. I'll wait to glue the seats in final position until I can see how high they sit in the pit. The only way to make any adjustment for too much height, will be to grind material from the bottom of the ejection seat.

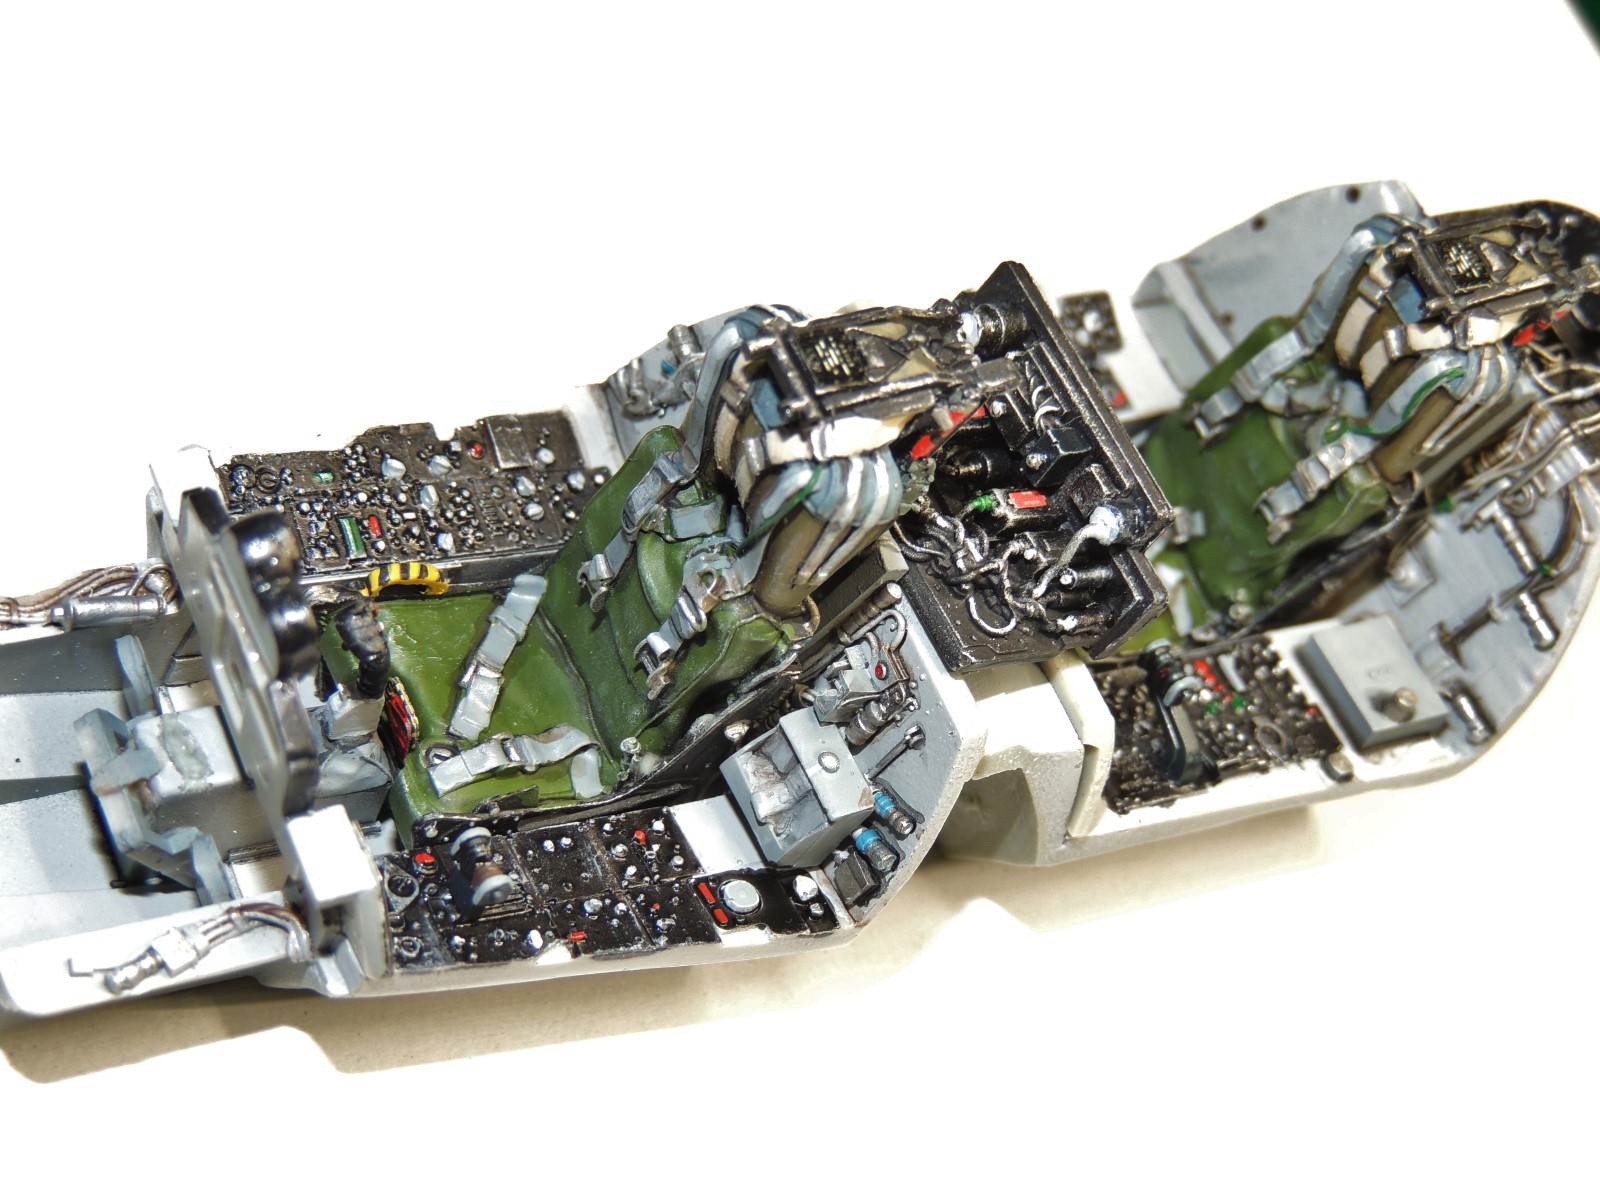


I inserted and fixed the cockpit tubs into the fuselage and double checked that everything lined up well before using the Cyano glue. The new cockpit parts only fit after quite a few dry-fittings and sanding away material mostly from the bottom side of the resin tub pieces

So getting back to my previous remark about how easy this will all go together if I'm careful and dry-fit everything and check constantly that everything is aligned...Well, that's not the real world and I found that out when I placed the bottom section of the conversion into position. It was warped !!!#@$**&%...I then decided to cut it into pieces and fit each one individually. Perhaps a little hasty in my decision, but once it's chopped, you live with it. So here are some photos showing that part of the fiasco.


I applied the first primer coat to the model so I can check my work. The seams for the conversion parts are within my personal tolerance of error and won't require too much additional sanding or putty. Here you can see the result.


The Exhaust Nozzles
I used the "Eduard" photo-etch exhaust nozzle detail set to add some interest to the back end of the model. The kit exhausts have very sparse detail which can improved on by the addition of these metal slats. There are 16 pieces in each nozzle and these parts must be folded individually in 2 directions. Afterward each must be glued correctly to align with the next piece. It was actually much easier than I thought as the parts fit very well with the existing detail in the kit nozzles, just time consuming to bend them all...


The rear fuselage is meatalized using Alclad II paint. I primed the area with Testors gloss black prior to spraying light coats of steel and burnt exhaust tones. The nozzles will get a treatment of steel paint to pick out panels by dry-brushing the exterior. The interior with get a light dry-brushing of gray paint.


Aft Fuselage underside
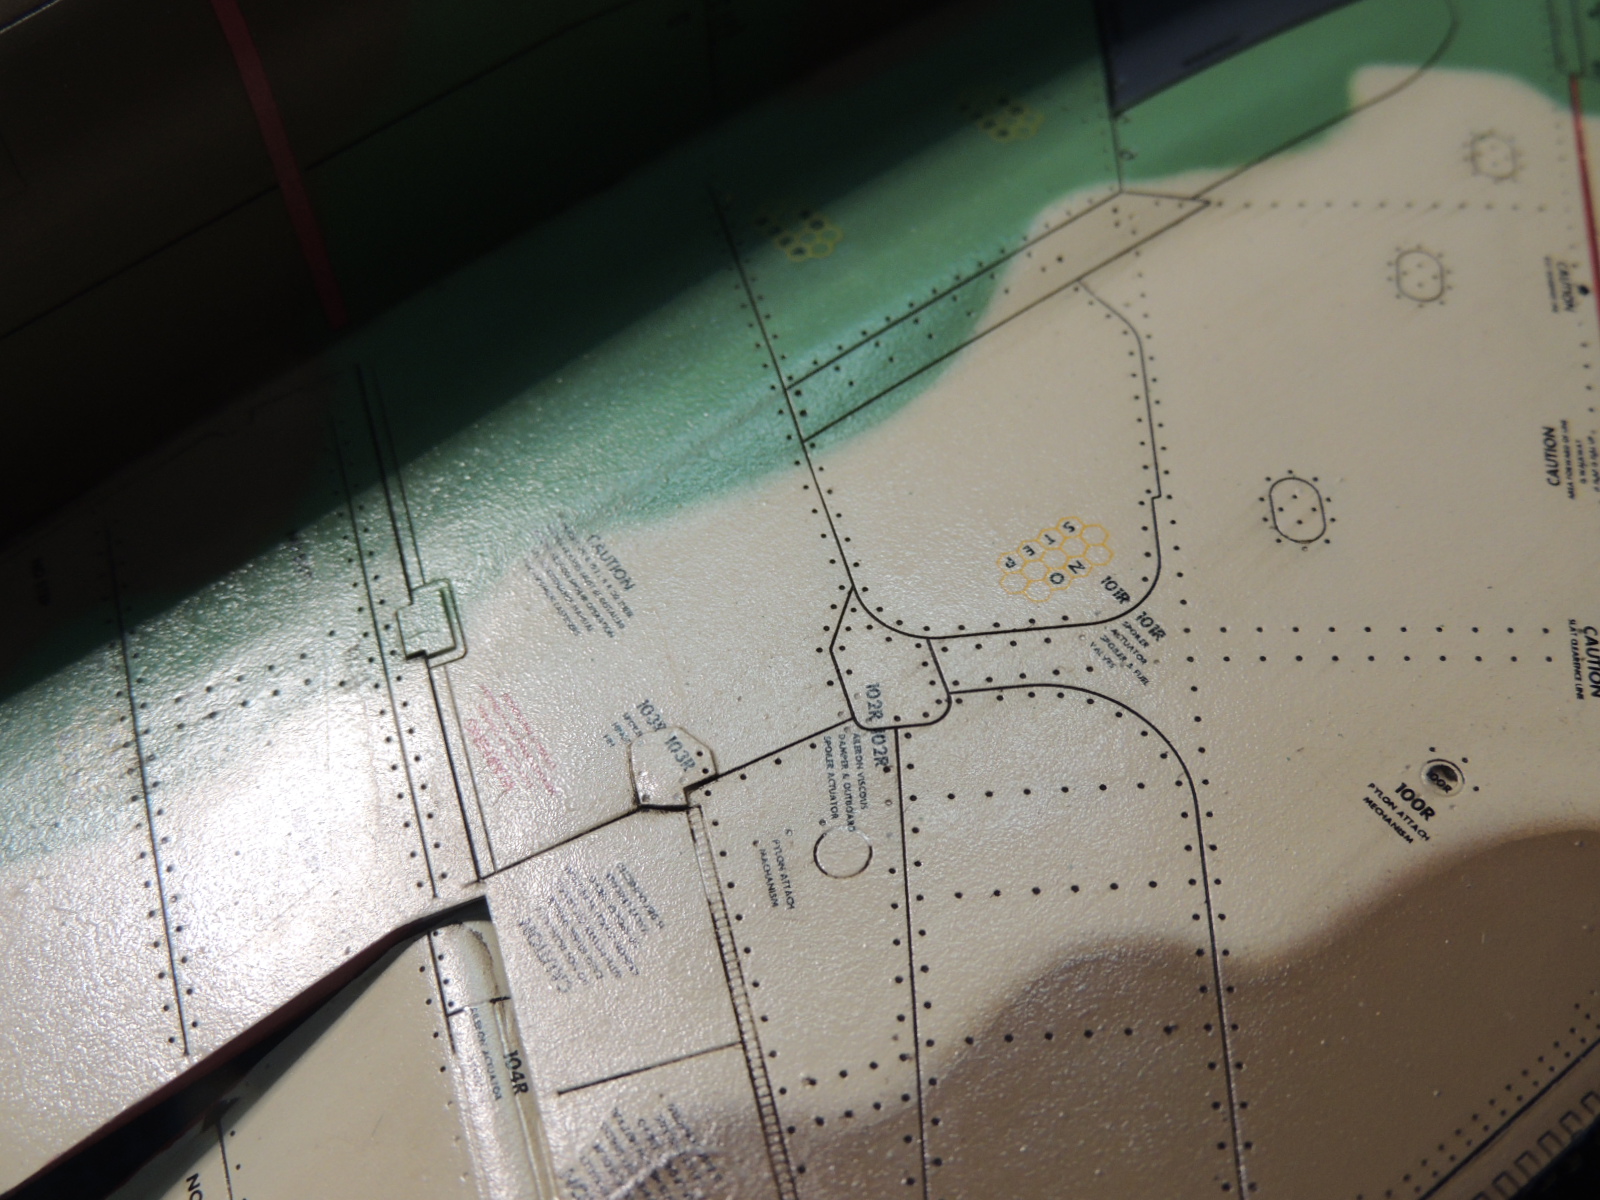
The underside of the wing needs to be modified to reflect the appearance of the aerodynamically smooth RF4-E. The AIM-7 "Sparrow" recess should be faired over as the actual aircraft does not have the capability to fire these missiles. The shallow troughs that the missile fits into the aft section of the wing were plated over in the production line. I covered mine with strip styrene plastic and faired it over with "Milliput" two part epoxy putty.


Here you can see the result after final sanding and a coat of primer.

PAINTING AND MARKINGS
I've reached the phase in this build when I needed to finalize which of these aircraft I was going to replicate. As much as the Israeli Phantom jets appear pretty much the same as far as the colors and camouflage, actually each one has small signature differences in the pattern which can be used to identify the individual aircraft. In some instances the identity of a particular plane can be discerned by these small differences. Israeli aircraft were very often handed off from one squadron to another and the numbers would then be changed. My goal here is to replicate one specific aircraft, close as possible with the information available. My choices were limited. There just weren't that many RF-4E Phantoms in the IAF.

The RF4-E which I finally chose is #195. This aircraft served with #69 squadron "Hammers" since 1971 when it first arrived in Israel. The "Hammers" jets flew missions at tree-top heights and specialized in low level reconnaissance of enemy positions. I wanted this model to appear as it was in the 1973 "Yom Kippur" war. After the war, all the F-4 recon jets were given the prefix number 4, so this aircraft became #495. The two photos I have of #195 show the left side of the aircraft at an early time while still numbered #195. The other photo shows the right side of the plane as it appeared after the war as #495, but still close enough to the original paint scheme to be used as a reference.

Starting to paint this evening and using Testors Modelmaster Enamel paint. This paint must be thinned to the consistency of water to flow well and to paint a fine line on low pressure. Any thicker and the paint will overspray like mad and cause you to curse, alot...
So here it is, I tune it up as I get more paint on and start to follow my guides more closely. The finished pattern will probably differ somewhat from what you see in these photos.

First color:Sand FS 33531
Some pre-shading between panels using the flat black primer as the shade. I spray with my Paasche H-1 single action airbrush from the center of each panel outward and in small areas at each session. I keep the pre-shading effect to a minimum. Even in the photo below the effect is more overdone than I like so I'll soften it with overspray of the sand color until it's barely visible.

Second color is Dark Tan FS 30219

Third color is : Pale Green FS 34227


This will be faired in with epoxy putty and painted when final go-around with the airbrush happens. I do this last bit of painting to clean up obvious overspray, adjust pattern contours and blend in added parts after the initial painting.
The forward landing gear door needs extra attention as the RF4 Phantom has a very different appearance to the Navy F4-J that the kit is derived from. This invloves opening the front to accomodate a clear panel and to install 2 landing lights in from the back side. Here you can see what I've done prior to painting.


Here is the forward landing-gear door after I inserted the MV lenses to replicate the 2 landing lights. I made the plexiglass cover plate from some clear packaging material.


The back side of the door has the housing for the lights and after the plexi cover went on and the light lenses were inserted, I boxed in the back with plastic strip and putty. I'll add some "electrical wiring" later on from thin solder going from the back of the door along the gear leg up into the well.


Decals
I found some time over this past weekend to apply a glosscote (Future Floor polish) over the entire model and all the other pieces that will require some decal application. "Isradecal" #IAF-40, RF-4 Phantom stencils that I'll using is very extensive. There will be hundreds of small decals on this model when I'm finally done. For me, it's actually one of the attractions of this early Photo-Phantom jet. So here we go. This may take awhile but I'm slowly getting there...


And here you can see the decal application is completed. This process took more or less a week. Next step another clear coat and panel line wash with oil paint.


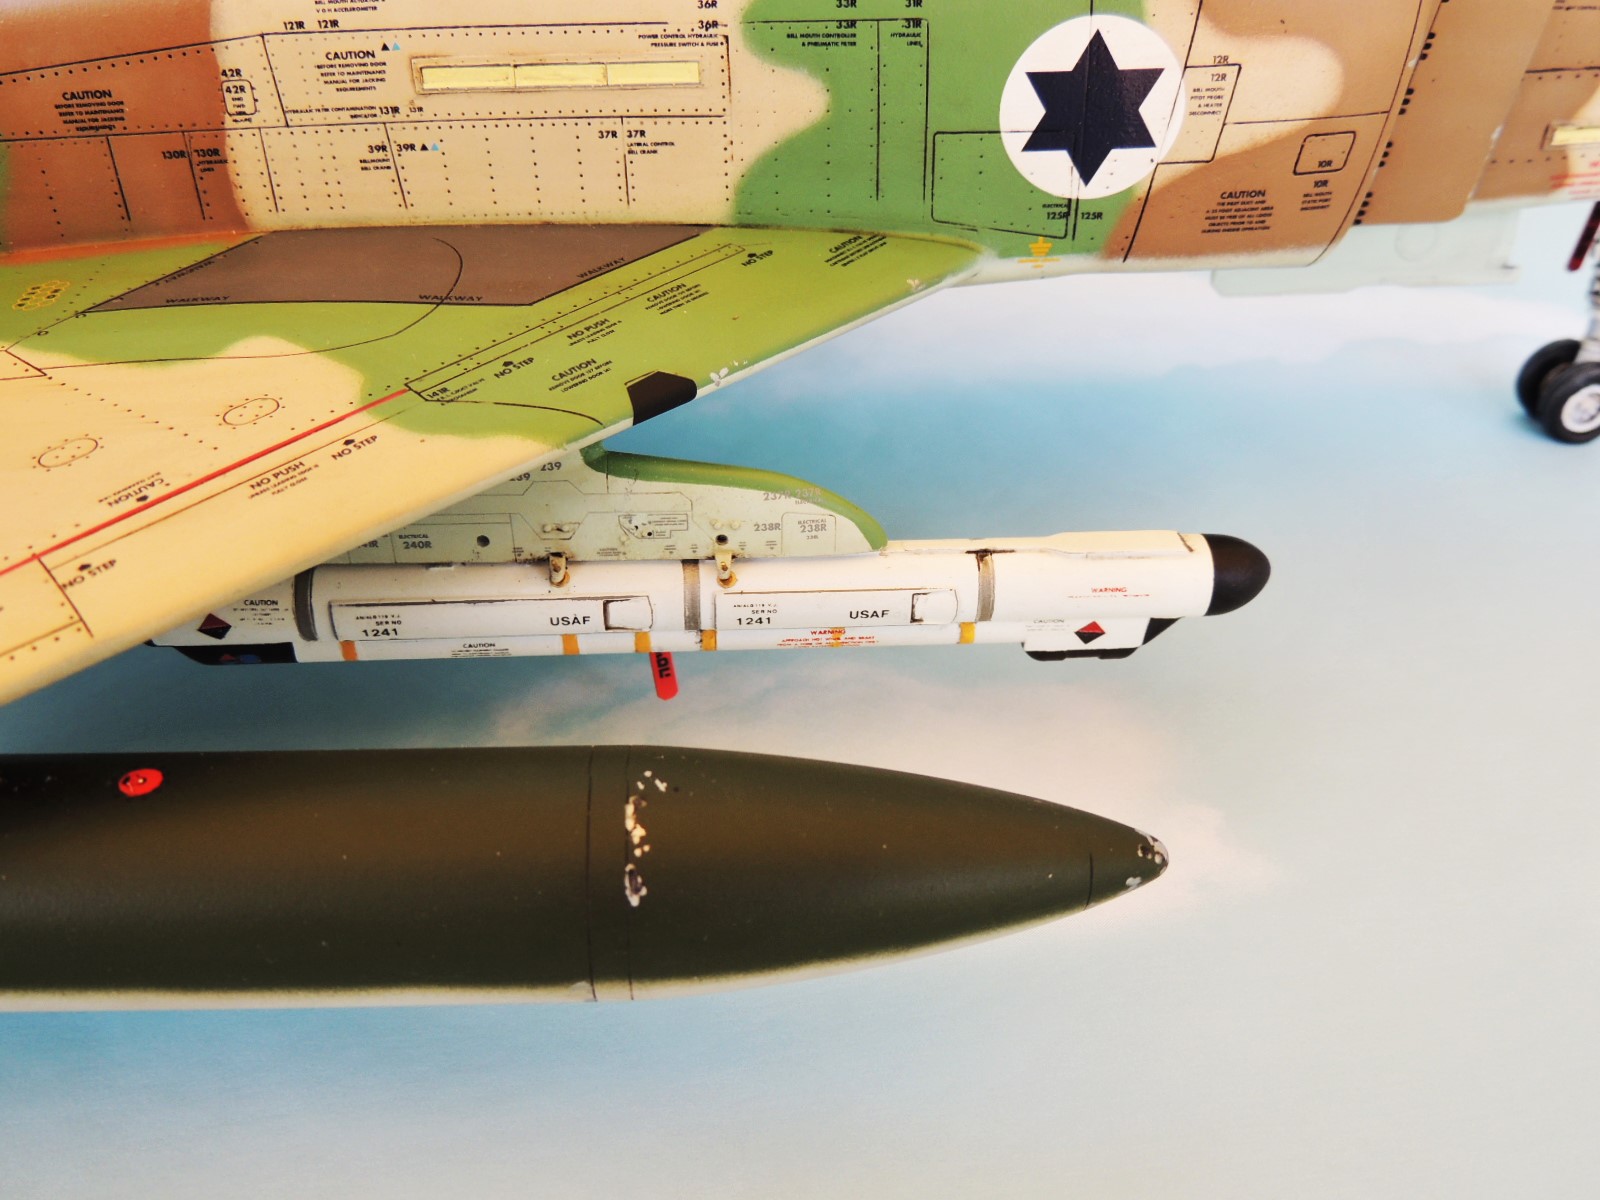
Here the details show very well and "pops out" after the wash with artist oils and a quick wipe down with mineral spirits to remove the excess..


I'm starting to see some light at the end of this tunnel. Here are a couple more photos.


Finally the finished model.......


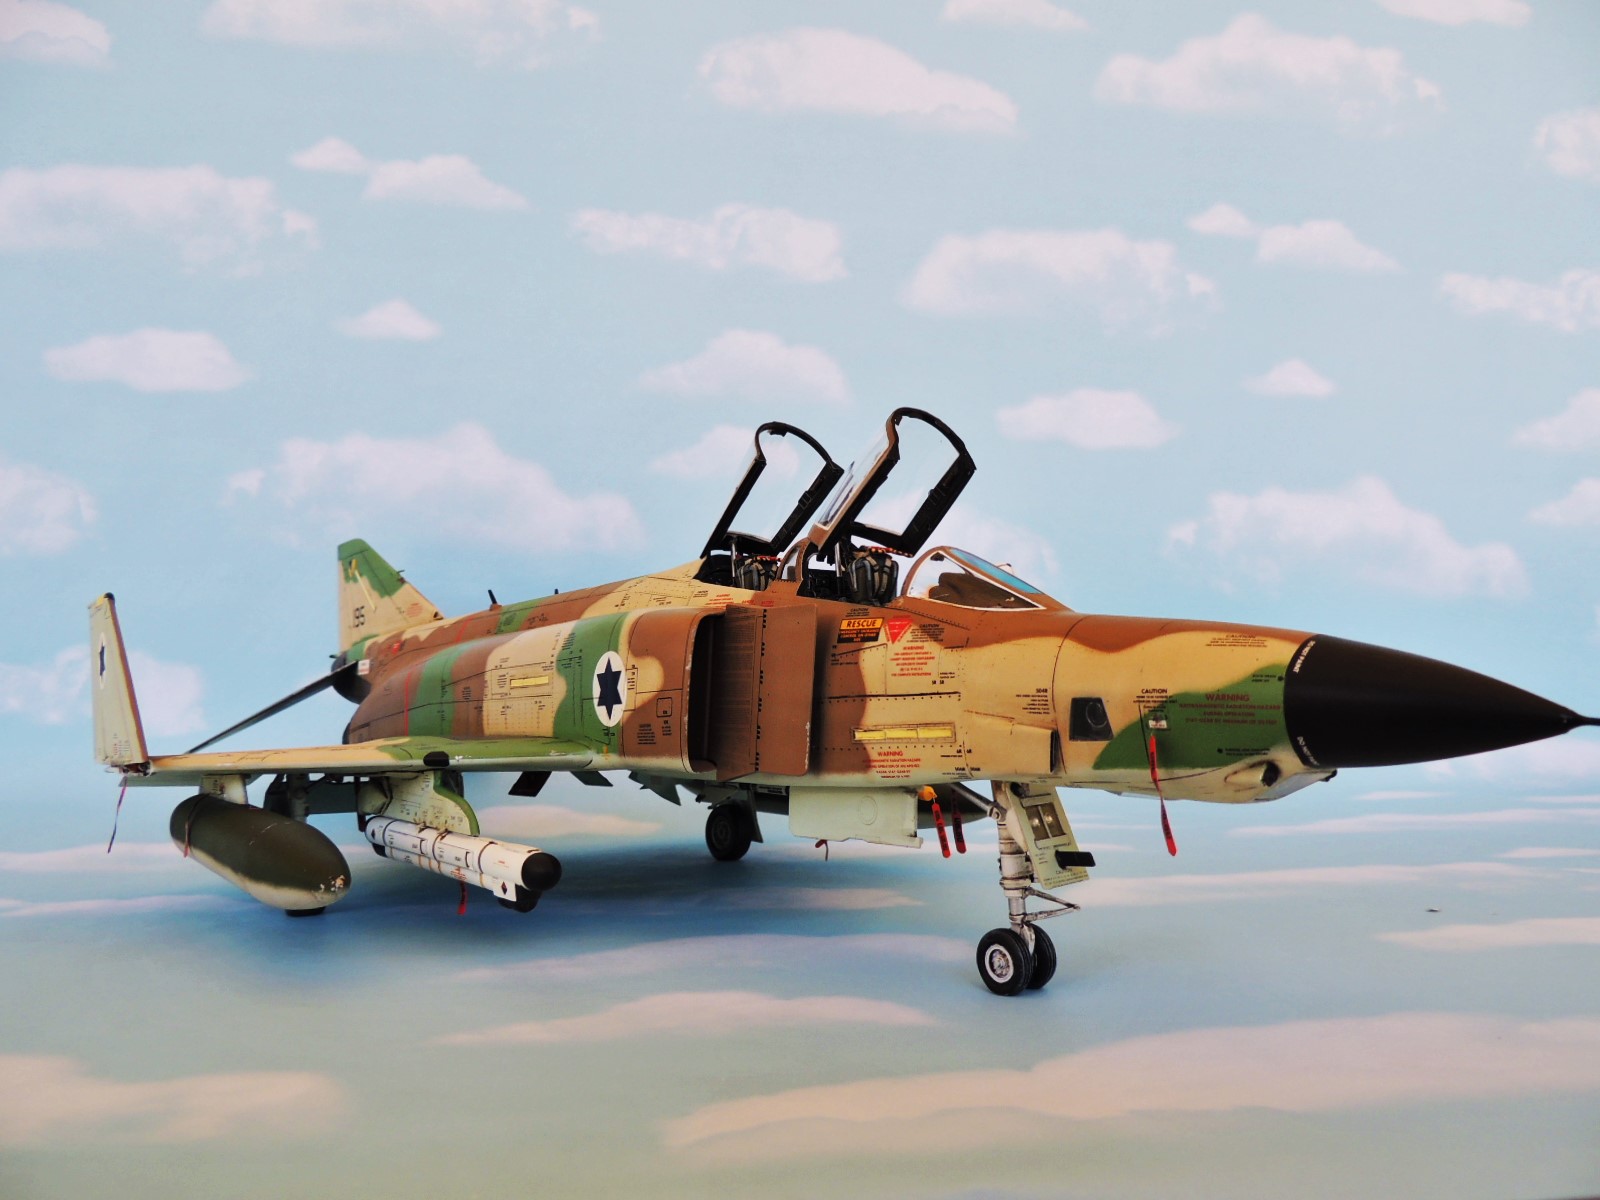


Thanks for following this long story...

And furthermore.........First time out to a competition.

COMMISSIONS
Yes, I will build commissioned scale models for select clients. I can be reached by email: seahors1@gate.net